In iOS 8, Apple introduced a new type of push notification that could be used by VoIP apps in order to wake them up when receiving a call. With this new type of notification developers don't need to set keep alive handler in order to keep the app alive. The new notification type will wake up the app in the background when needed instead of keeping the app running in the background. Overall this should help reduce data usage and improve battery life for users.
This all sounds good but after looking through the documentation there is no reference to how to implement this. The documentation states:
In iOS 8 and later, voice-over-IP (VoIP) apps register for UIRemoteNotificationTypeVoIP remote notifications instead of using this method.
The problem is that UIRemoteNotificationTypeVoIP does not exists. It does not exist because Apple has introduced a new push notification framework specifically for this type of notification which is called PushKit. So let's get into it and implement VoIP notifications into an application
Configuration
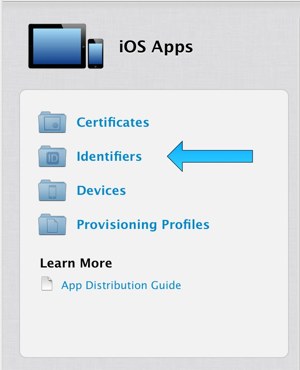
Before getting started with the implementation there are a couple of things that need to be done. Firstly, a VoIP Services certificate will be needed so navigation to the iOS Developer Center and navigate to the Certificates, Identifier & Profiles section as seen below:

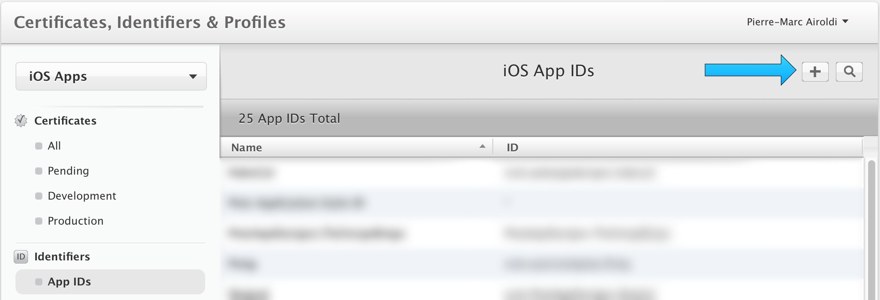
In order to be able to receive push notifications an app identifier needs to be created. This can be done by navigating to the identifiers section then clicking the add button.
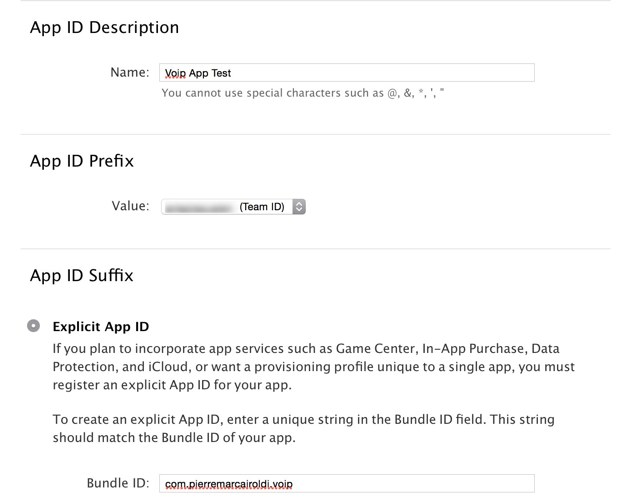
Since we are using push notifications we will need to specify the bundle id for the app. For this example we will be using com.pierremarcairoldi.voip. The form should look like the one below. Don't worry about the App Services section for now, we will fill that in later.
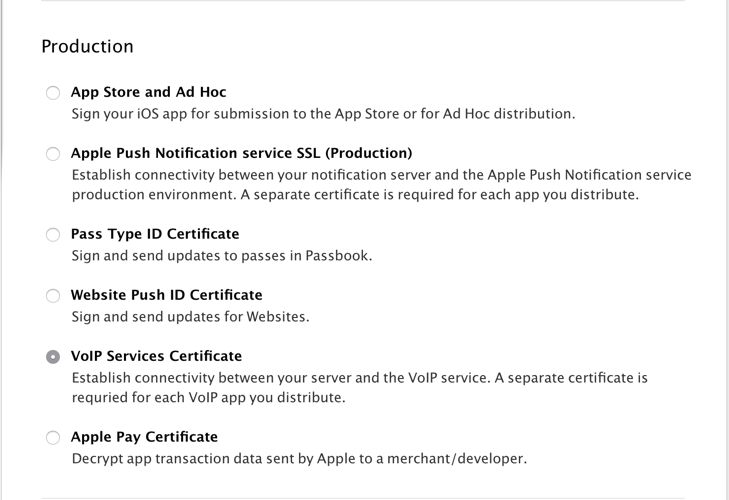
So far we have setup our app identifier but we still need to setup the push notifications. To do so navigate to the Certificates section and click the add button and then select the VoIP Services Certificate option as seen below:

We will then be asked to select an app id for the VoIP Service Certificate. For this we will pick the identifier we created in the previous section from the dropdown. The identifier will contain some random letters and number at beginning so just pick the one that end in com.pierremarcairoldi.voip. We are now asked to generate a Certificate Signing Request so follow the onscreen instructions and then click continue. The next section will ask us to upload the CSR file we just created so that it can generate our certificate. Once this is done click generate. The result should look something like this:
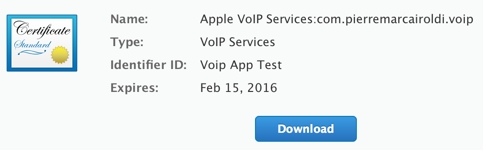
Download the certificate and open it when it has finished. This should open the Keychain Access app and you should see the certificate under the certificates section. Ok, we are now done with the setup. We can actually start working on the app.
Implementation
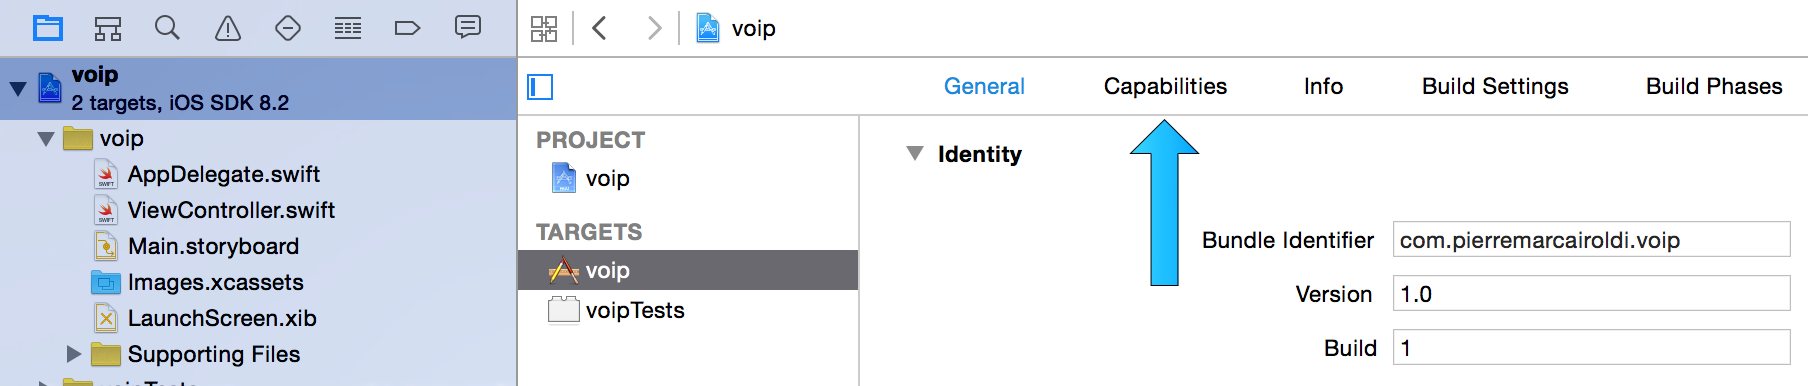
To start off, open Xcode and create a new Single View Application iOS app. For the product name use voip and make sure the the bundle identifier is com.pierremarcairoldi.voip. The bundle identifier is very important since in order for push to work for our app it needs to be the same as the one we used to create the certificate in the previous section.
The last thing we need to do before writing any code is to turn on Background Modes for our app. This option is found under the capabilities tab under our app target (as seen below).
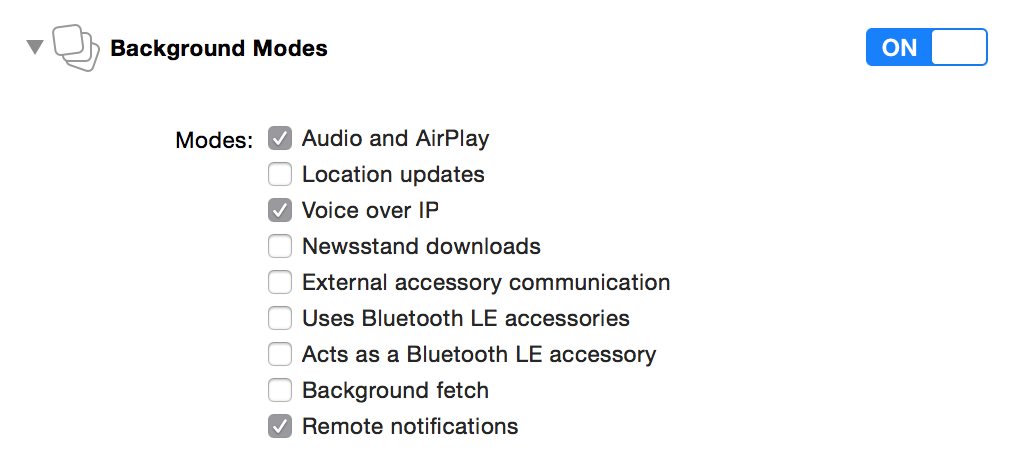
Under this tab there will be a list of options. Find Background Modes and toggle the switch on. We will need to then check all the options we would need for a VoIP app which includes:
- Audio and Airplay
- Voice over IP
- Remote notifications
We can now start adding code the project. There is a lot of set up to add such a small feature. We will now open up the AppDelegate.swift, import PushKit and then register for notifications.
import UIKit
import PushKit

@UIApplicationMain
class AppDelegate: UIResponder, UIApplicationDelegate {

    var window: UIWindow?

    func application(application: UIApplication, didFinishLaunchingWithOptions launchOptions: [NSObject: AnyObject]?) -> Bool {

        //Enable all notification type. VoIP Notifications don't present a UI but we will use this to show local nofications later
        let notificationSettings = UIUserNotificationSettings(forTypes: UIUserNotificationType.Alert | UIUserNotificationType.Badge | UIUserNotificationType.Sound, categories: nil)

        //register the notification settings
        application.registerUserNotificationSettings(notificationSettings)

        //output what state the app is in. This will be used to see when the app is started in the background
        NSLog("app launched with state \(application.applicationState.stringValue)")

        return true
    }

    func applicationWillTerminate(application: UIApplication) {

        //output to see when we terminate the app
        NSLog("app terminated")
    }
}
In order to check that our app is working properly there are a couple of print messages. This will allow us to check that our app is launched in the background when we receive a notification. We are using NSLog instead of println in this case since println does not write to the system log (this will be useful later). Since we are using the registerUserNotificationSettings method we need to implement it's delegate callback application(application: UIApplication, didRegisterUserNotificationSettings notificationSettings: UIUserNotificationSettings). In this callback we will register the VoIP notifications since we will know that the user has agreed to receive notifications.
func application(application: UIApplication, didRegisterUserNotificationSettings notificationSettings: UIUserNotificationSettings) {

    //register for voip notifications
    let voipRegistry = PKPushRegistry(queue: dispatch_get_main_queue())
    voipRegistry.desiredPushTypes = Set([PKPushTypeVoIP])
    voipRegistry.delegate = self;
}
We have just enabled VoIP notifications by declaring the voipRegistry object. The PKPushRegistry initializer takes a GCD queue as input which determines what queue it's delegates callbacks get called on. For now we will use the main queue since for this simple test it does not matter too much. In order to be able to act on the voipRegistry object we need to set a delegate which for simplicity we will set to self. The delegate for voipRegistry is of type PKPushRegistryDelegate which has three method, two of which are required. So let's add those methods to our project.
extension AppDelegate: PKPushRegistryDelegate {

    func pushRegistry(registry: PKPushRegistry!, didUpdatePushCredentials credentials: PKPushCredentials!, forType type: String!) {

        //print out the VoIP token. We will use this to test the nofications.
        NSLog("voip token: \(credentials.token)")
    }

    func pushRegistry(registry: PKPushRegistry!, didReceiveIncomingPushWithPayload payload: PKPushPayload!, forType type: String!) {

        let payloadDict = payload.dictionaryPayload["aps"] as? Dictionary<String, String>
        let message = payloadDict?["alert"]

        //present a local notifcation to visually see when we are recieving a VoIP Notification
        if UIApplication.sharedApplication().applicationState == UIApplicationState.Background {

            let localNotification = UILocalNotification();
            localNotification.alertBody = message
            localNotification.applicationIconBadgeNumber = 1;
            localNotification.soundName = UILocalNotificationDefaultSoundName;

            UIApplication.sharedApplication().presentLocalNotificationNow(localNotification);
        }

        else {

            dispatch_async(dispatch_get_main_queue(), { () -> Void in

                let alert = UIAlertView(title: "VoIP Notification", message: message, delegate: nil, cancelButtonTitle: "Ok");
                alert.show()
            })
        }

        NSLog("incoming voip notfication: \(payload.dictionaryPayload)")
    }

    func pushRegistry(registry: PKPushRegistry!, didInvalidatePushTokenForType type: String!) {

        NSLog("token invalidated")
    }
}
We don't really need to add any code to these methods but for our tests we will present a UILocalNotification or a UIAlertView when we receive a VoIP push notification. We are printing the token since we will need this later to test that we can receive notifications properly. That's it! We should have functioning notifications now which will restart our app in the background when received.
Testing
To test the sending of push notifications we will use a useful tool by Mattt Thompson called houston. To install the tool just run the following command (sudo might be needed depending on your installation):
(sudo) gem install houston
Remember that certificate we created oh so long ago? Well, it's time to use it now. Houston needs us to convert it to something it can understand which can be done by following the instructions here. Once we have our .pem file we can use the command line interface of houston to push notifications to our app.
Let's go back into Xcode and run our app. To test push notifications we will need to run the app on an actual device. So let's connect a device and then click run. The console output should show the following log:

Take the VoIP token and copy it into your clipboard so that we can use it in the following houston command:
apn push "<token>" -c /path/to/apple_push_notification.pem -m "Hello from the command line!"
Open up the Terminal app of your choice and then enter the above command with your parameters and run it. The output should look as follows:

The application should also display either a UILocalNotification or UIAlertView if everything has gone right. Now terminate the app and rerun the command. To see that the app has resumed we can open up devices viewer by going to Window > Devices in the top menu in Xcode.
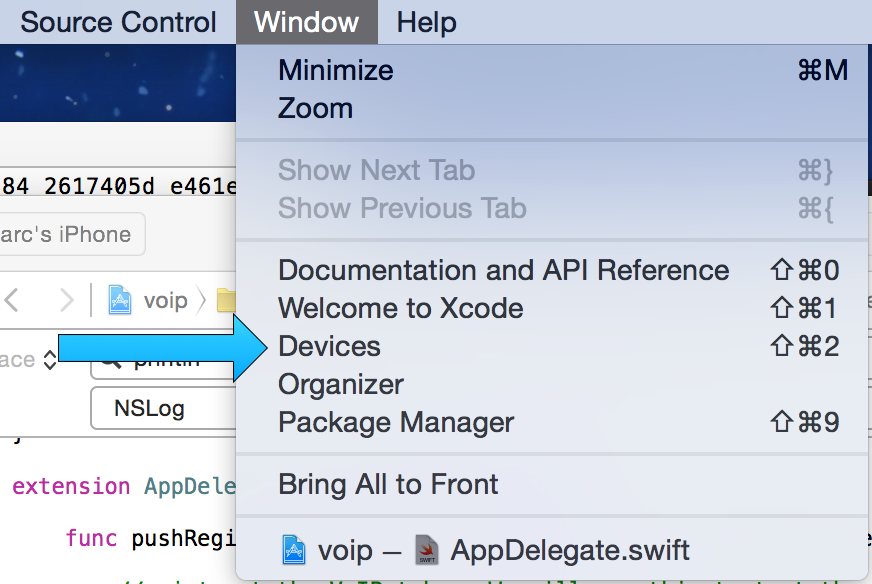
Select the correct device from the left and then click the bottom section where there is a log. After having clicked into the log area enter ⌘ + f to search. Search app launched with state and check if the app has resumed in the background.
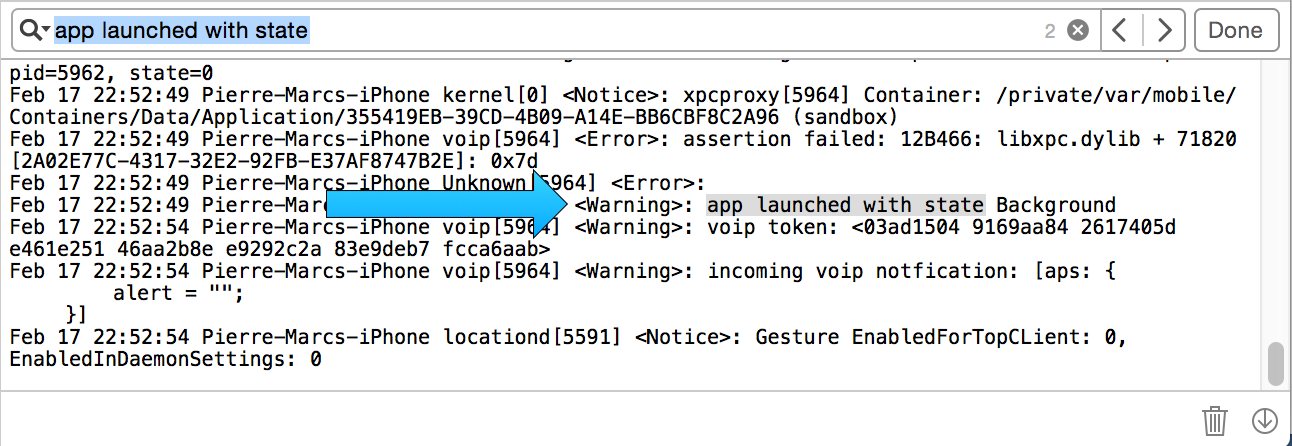
We can see that the application was restarted in the background when we received the VoIP notification as expected.
The full source for this project can be found on Github. Have fun implementing VoIP notifications in your iOS app.